Understanding how to achieve perfect skin color in photography involves more than just adjusting exposure or contrast. It requires a deep awareness of how camera sensors interpret light and how color balance can evoke emotion. A recent video by photographer Alex Cooke highlights a five-step workflow developed by expert Needham for achieving natural and consistent skin tones using Lightroom.
The tutorial begins with the crucial first step: recognizing the inherent color bias in camera sensors. Whether the sensor is from Canon, Nikon, Sony, or any other brand, each introduces a subtle tint that can distort skin tones. Under seemingly ideal lighting, portraits can appear unflatteringly green or pink due to these biases. As Needham emphasizes, raw image files often do not deliver perfect skin color straight out of the camera. Thus, selecting the appropriate camera profile is essential.
Needham compares various profiles, including Adobe Color, Adobe Standard, and manufacturer-specific profiles, revealing how each can impact skin tone. His findings suggest that Adobe’s profiles are particularly versatile, facilitating brand and model consistency while establishing a neutral base for further color adjustments.
Building on a Strong Foundation
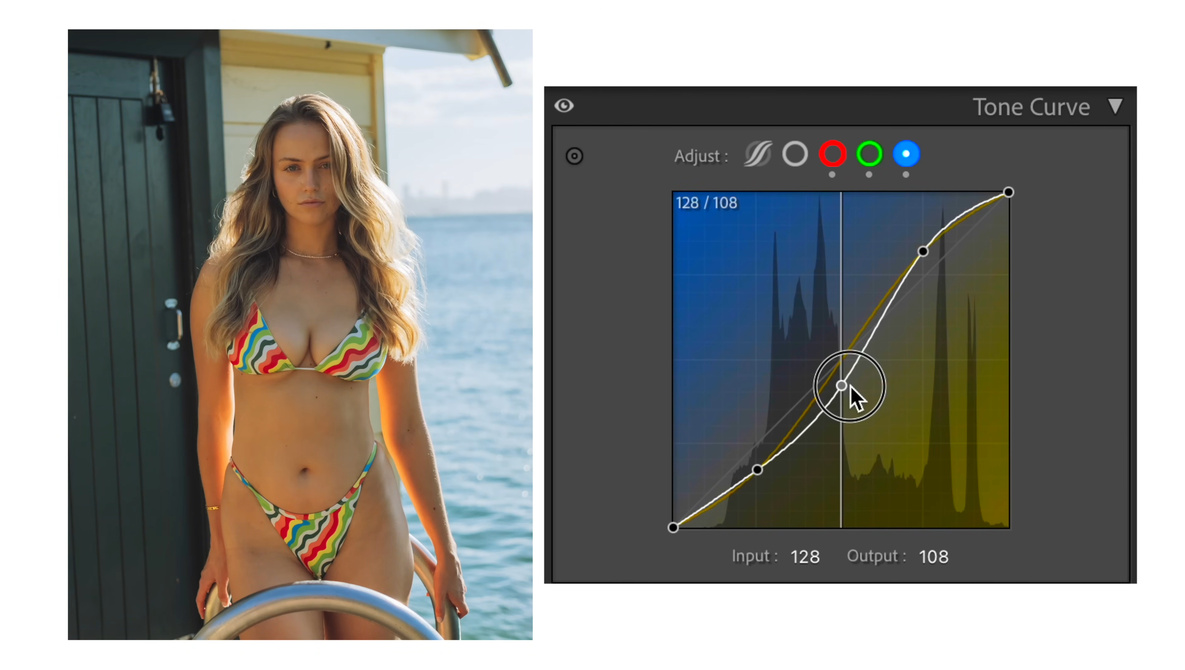
Once the initial camera profile is set, the next phase involves correcting white balance, a critical yet sensitive aspect of color work. After this correction, Needham introduces the RGB tone curve, a tool that many photographers tend to avoid due to the potential for over-editing. He demonstrates how minor adjustments to the curve can significantly alter the emotional quality of skin tones. For example, reducing blue adds warmth, increasing red creates a soft peach glow, and balancing green maintains realism.
Needham’s meticulous approach to constructing a “rosy peach” midtone from grayscale illustrates that color correction is a precise science rather than a guessing game. The adjustments he makes are intentional and measurable, guiding how light interacts with the skin.
The subsequent step, color calibration, is often misunderstood. Needham reframes it as “sensor tuning,” a process that helps realign hues that may have shifted. By adjusting primary colors—specifically moving the red primary toward orange or the green primary toward teal—photographers can reduce unwanted yellow-green tints. The immediate result is a more vibrant, healthy skin tone that is adaptable across various skin types.
Refinement through HSL Adjustments
With calibration complete, Needham utilizes the HSL (Hue, Saturation, Luminance) panel for fine-tuning. Even slight increases in orange luminance can enhance the skin’s appearance, achieving a fresh, soft finish without compromising depth. Throughout the process, Needham prioritizes education over reliance on presets, providing viewers with a clear understanding of the rationale behind each adjustment.
His methodology exemplifies the intersection of color theory and digital tools, illustrating how the interplay of red, green, and blue determines not only the aesthetic but also the emotional resonance of an image. This workflow encourages patience and precision, enabling photographers to produce consistent, realistic color across any portrait system.
For those interested in mastering skin tone adjustments, Cooke’s video featuring Needham’s insights serves as a valuable resource. With this knowledge, photographers can enhance their capabilities and create portraits that truly reflect the beauty of their subjects.